Event Manager FAQ
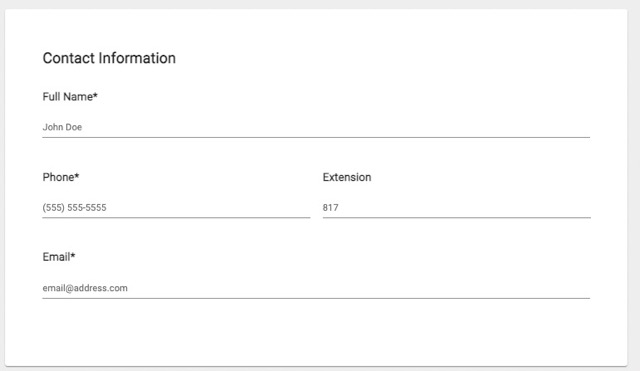
Enter the contact information for the event coordinator or person whom visitors can contact with questions about the event.
*Note: This information is publicly displayed for each event.
- Each new event or series of events is automatically assigned an Event ID number.
*Note: This number cannot be changed. - Type the name of the Organization for this event, then select it from the drop-down menu.
- Enter an Event Name.
- Add a Summary. This will show in search results.
- If needed, check the box next to Add a Full Description. This allows for a longer description of the event, which can include text formatting as well as links.
*Note: The Full Description field has a character limit of 8,000. An error will display if you attempt to save the event and the Full Description has more than 8,000 characters.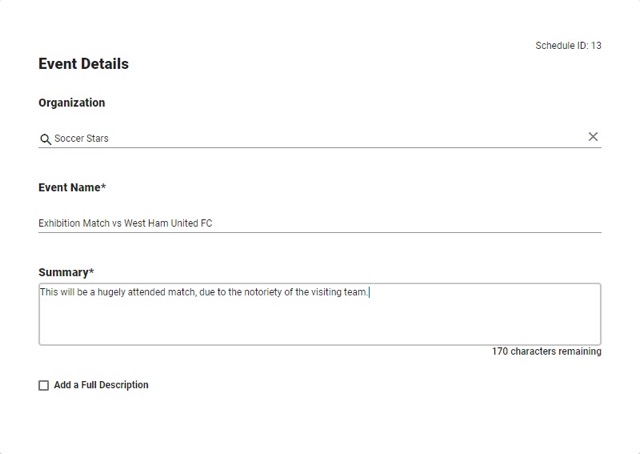
- Select the desired location from the drop-down menu
Or
- Click Location Search in the Locations You've Selected panel.
- Search or filter the list and check the box next to each location needed for this event.
- Click Save.
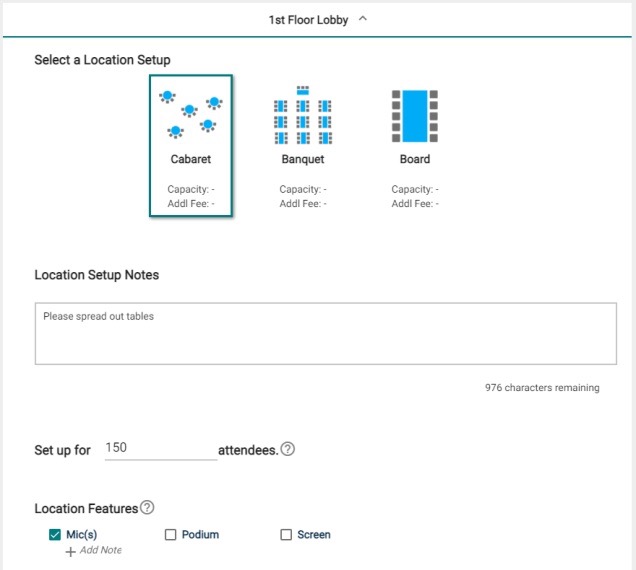
- Click on the desired Location Setup for this event. The Capacity and Additional Fee (if any) for setup is displayed beneath each option.
- Enter any Location Setup Notes needed for each selected Location.
*Note: If no room configurations are available for the selected Location, you will need to click the name of the location to expand this panel before entering any notes.
- Enter the number of attendees.
- Check the box next to any desired Location Features, such as Stage Lighting or a Podium.
*Note: If a feature is grayed out, it is fixed to the location and cannot be removed. - Click Add Note under a Feature to add details or instructions for the selected Feature.
- To add a location that isn't listed, click Add a Custom Location and enter the name of the location needed.
- Once the locations are selected, the Date & Times Available For The Selected Location(s) will populate any time slots that are already reserved.
- Navigate to the start date needed for your event.
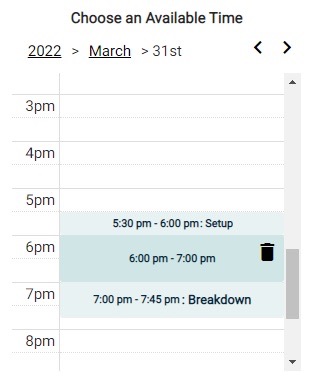
- Select the time you need by clicking on the appropriate start time on the calendar. Drag the time slot to be the appropriate length.
*Note: Any times that are unavailable will show with a block marked Reserved or Closed. Reserved means that this time has been booked with another event. Closed means that this location is not available for booking during this time.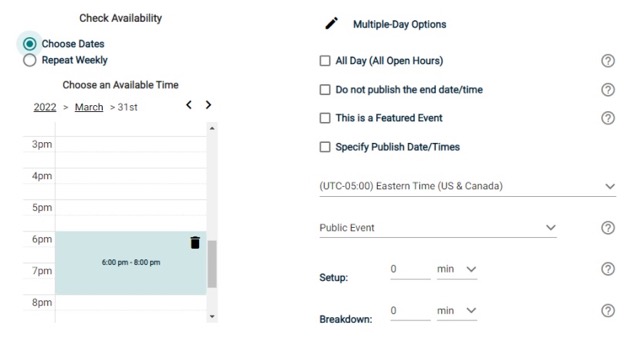
- If your event will repeat, click on the pencil icon next to Multiple-Day Options.
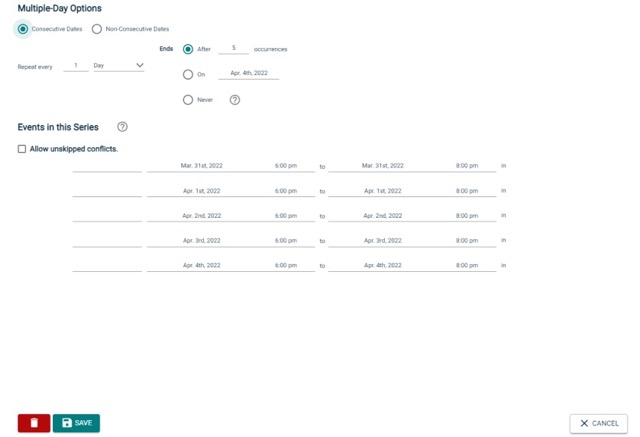
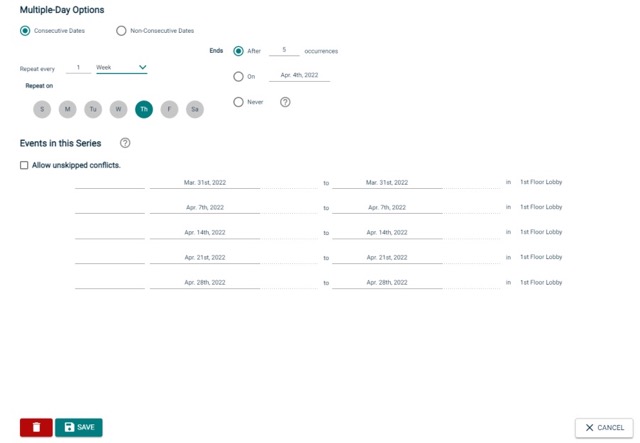
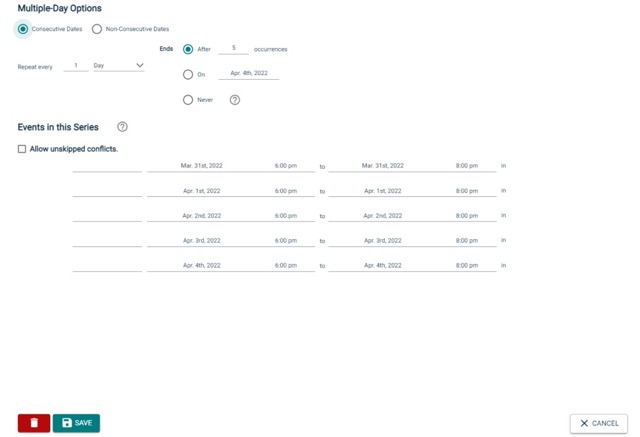
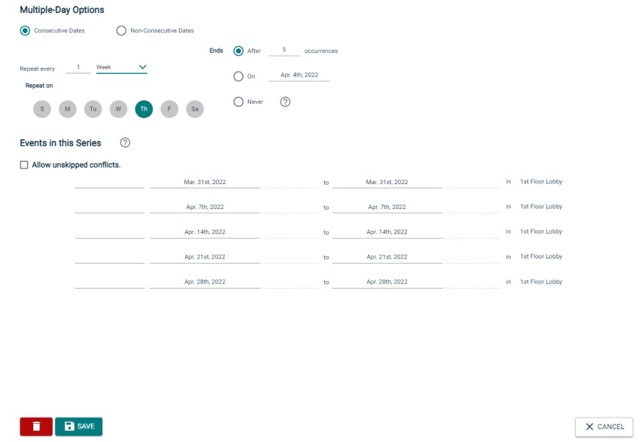
*Note: This option will only appear after you have selected a time on the calendar.- Choose between Consecutive Dates and Non-Consecutive Dates.
- If you chose Consecutive Dates, choose how often the event repeats, and when the event series ends. After choosing the event pattern, the Events in this Series will populate. Any necessary adjustments can be made here before saving, including the event name, date, or time of an individual event.
- If you chose Non-Consecutive Dates, click on the dates on the calendar you need for your event series. Then make any necessary adjustments to the date, time, or event name for the individual events.
- Some events may be marked as a Conflict. You can choose to skip those conflicting dates or leave them in the series.
*Note: If you choose to skip any dates that are marked as a conflict, they will be deleted from the series.- Check the box next to Allow un-skipped conflicts if you would like to allow double-booked dates to be included in this event series.
- Click Save.
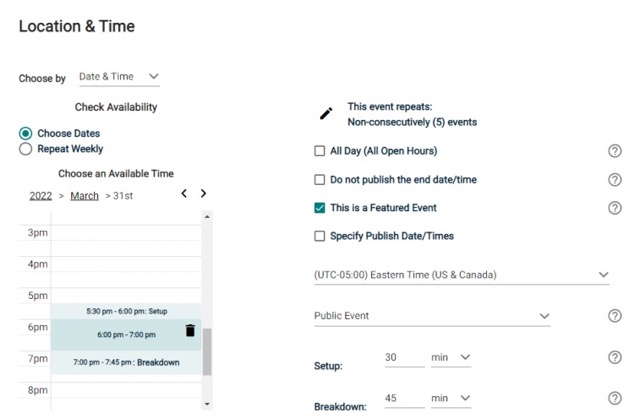
- Do not publish the end date/time: Select this option to display the start date and time of the event, but not the end date and time. An end date and time are still required to publish the event, but you may want to hide that information if you are unsure of the event end time, such as with a sporting event.
- This is a Featured Event: Choosing this option will prominently feature the event at the top of your calendar. Featured events must occur within the next 30 calendar days to be displayed, and must have an event image. By default, the next four featured events will be displayed on the calendar page.
- Specify Publish Date/Times: Determine when the calendar event should appear on the calendar and when it should be removed from the calendar.
- If the time zone for this event varies from the default time zone, select it from the drop-down.
- Choose whether this is a Public Event, Private Event, or Unlisted Event.
- If applicable, enter the Setup and Breakdown time needed for your event. This prevents others from booking over the setup and breakdown time, while the event on the public calendar will only display the actual event start time.

- Select the desired location from the drop-down menu
Or
- Click Location Search in the Locations You've Selected panel.
- Search or filter the list and check the box next to each location needed for this event.
- Click Save.
- Click on the desired Location Setup for this event. The Capacity and Additional Fee (if any) for setup is displayed beneath each option.
*Note: If this Location Setup has a Task Type associated with it, a task will be created automatically for this location setup when the event is saved. Location Setups and Features are only available if you are using Event Manager Professional or Event Manager Enterprise. Contact Client Services for more information.
- Enter any Location Setup Notes needed for each selected Location.
*Note: If no room configurations are available for the selected Location, you will need to click the name of the location to expand this panel before entering any notes.
- Enter the number of attendees.
- Check the box next to any desired Location Features, such as Stage Lighting or a Podium.
*Note: If a feature is grayed out, it is fixed to the location and cannot be removed.- Click Add Note under a Feature to add details or instructions for the selected Feature.
- To add a location that isn't listed, click Add a Custom Location and enter the name of the location needed.
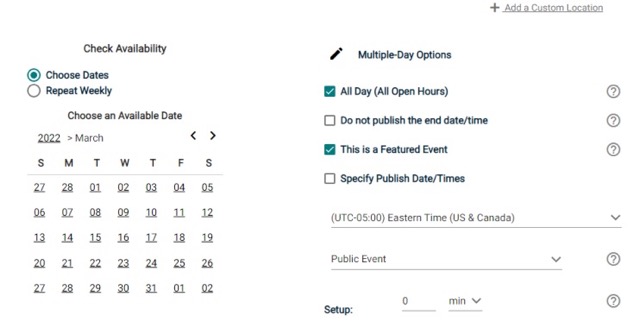
- Check the box next to All Day.
- Navigate to the appropriate month on the calendar.
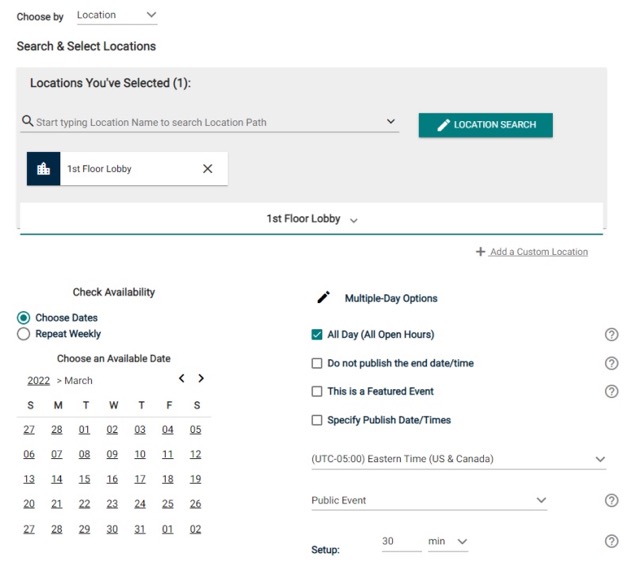
- Click on the start date needed for this event.
- If your event will repeat, click on the pencil icon next to Multiple-Day Options.
*Note: This option will only appear after you have selected a start date on the calendar.
- Choose between Consecutive Dates and Non-Consecutive Dates.
- If you chose Consecutive Dates, choose how often the event repeats, and when the event series ends. After choosing the event pattern, the Events in this Series will populate. Any necessary adjustments can be made here before saving, including the event name or date of an individual event.
- If you chose Non-Consecutive Dates, click on the dates on the calendar you need for your event series. Then make any necessary adjustments the date or event name for the individual events.
- Some events may be marked as a Conflict. You can choose to skip those conflicting dates or leave them in the series.
*Note: If you choose to skip any dates that are marked as a conflict, they will be deleted from the series.
- Check the box next to Allow un-skipped conflicts if you would like to allow double-booked dates to be included in this event series.
- Click Save.
- Do not publish the end date/time: Select this option to display the start date and time of the event, but not the end date and time. An end date and time are still required to publish the event, but you may want to hide that information if you are unsure of the event end time, such as with a sporting event.
- This is a Featured Event: Choosing this option will prominently feature the event at the top of your calendar. Featured events must occur within the next 30 calendar days to be displayed, and must have an event image. By default, the next four featured events will be displayed on the calendar page.
- Specify Publish Date/Times: Determine when the calendar event should appear on the calendar and when it should be removed from the calendar.
- If the time zone for this event varies from the default time zone, select it from the drop-down.
- Choose whether this is a Public Event, Private Event, or Unlisted Event.
- If applicable, enter the Setup and Breakdown time needed for your event. This prevents others from booking over the setup and breakdown time, while the event on the public calendar will only display the actual event start time.
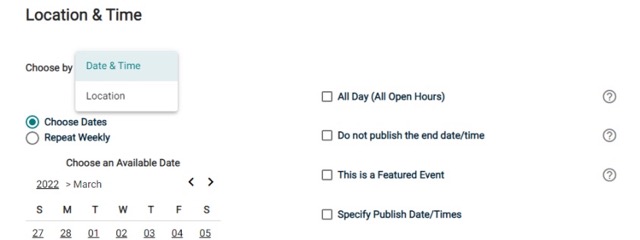
- In the Choose By drop-down menu, select Date & Time.
- Navigate to the start date needed for your event.
- Select the time you need by clicking on the appropriate start time on the calendar. Drag the time slot to be the appropriate length.
- Click on the start date needed for this event.
- If your event will repeat, click on the pencil icon next to Multiple-Day Options.
*Note: This option will only appear after you have selected a time on the calendar.
- Choose between Consecutive Dates and Non-Consecutive Dates.
- If you chose Consecutive Dates, choose how often the event repeats, and when the event series ends. After choosing the event pattern, the Events in this Series will populate. Any necessary adjustments can be made here before saving, including the event name, date, or time of an individual event.
- If you chose Non-Consecutive Dates, click on the dates on the calendar you need for your event series. Then make any necessary adjustments to the date, time, or event name for the individual events.
- Some events may be marked as a Conflict. You can choose to skip those conflicting dates or leave them in the series.
*Note: If you choose to skip any dates that are marked as a conflict, they will be deleted from the series.
- Check the box next to Allow un-skipped conflicts if you would like to allow double-booked dates to be included in this event series.
- Click Save.
- Do not publish the end date/time: Select this option to display the start date and time of the event, but not the end date and time. An end date and time are still required to publish the event, but you may want to hide that information if you are unsure of the event end time, such as with a sporting event.
- This is a Featured Event: Choosing this option will prominently feature the event at the top of your calendar. Featured events must occur within the next 30 calendar days to be displayed, and must have an event image. By default, the next four featured events will be displayed on the calendar page.
- Specify Publish Date/Times: Determine when the calendar event should appear on the calendar and when it should be removed from the calendar.
- If the time zone for this event varies from the default time zone, select it from the drop-down.
- Choose whether this is a Public Event, Private Event, or Unlisted Event.
- If applicable, enter the Setup and Breakdown time needed for your event. This prevents others from booking over the setup and breakdown time, while the event on the public calendar will only display the actual event start time.
- Select the desired location from the drop-down menu
Or
-
-
- Click Location Search in the Locations You've Selected panel.
- Search or filter the list and check the box next to each location needed for this event.
- Click Save.
- Click on the desired Location Setup for this event. The Capacity and Additional Fee (if any) for setup is displayed beneath each option.
*Note: If this Location Setup has a Task Type associated with it, a task will be created automatically for this location set up when the event is saved. Location Setups and Features are only available if you are using Event Manager Professional or Event Manager Enterprise. Contact Client Services for more information.
- Enter any Location Setup Notes needed for each selected Location.
*Note: If no room configurations are available for the selected Location, you will need to click the name of the location to expand this panel before entering any notes.
- Enter the number of attendees.
- Check the box next to any desired Location Features, such as Stage Lighting or a Podium.
*Note: If a feature is grayed out, it is fixed to the location and cannot be removed.
- Click Add Note under a Feature to add details or instructions for the selected Feature.
- To add a location that isn't listed, click Add a Custom Location and enter the name of the location needed.
-
- In the Choose By drop-down menu, select Date & Time.
- Check the box next to All Day.
- Navigate to the appropriate month on the calendar.
- Click on the start date needed for this event.
- If your event will repeat, click on the pencil icon next to Multiple-Day Options.
*Note: This option will only appear after you have selected a start date on the calendar.
- Choose between Consecutive Dates and Non-Consecutive Dates.
- If you chose Consecutive Dates, choose how often the event repeats, and when the event series ends. After choosing the event pattern, the Events in this Series will populate. Any necessary adjustments can be made here before saving, including the event name or date of an individual event.
- If you chose Non-Consecutive Dates, click on the dates on the calendar you need for your event series. Then make any necessary adjustments to the date or event name for the individual events.
- Some events may be marked as a Conflict. You can choose to skip those conflicting dates or leave them in the series.
*Note: If you choose to skip any dates that are marked as a conflict, they will be deleted from the series.
- Check the box next to Allow un-skipped conflicts if you would like to allow double-booked dates to be included in this event series.
- Click Save.
- Do not publish the end date/time: Select this option to display the start date and time of the event, but not the end date and time. An end date and time are still required to publish the event, but you may want to hide that information if you are unsure of the event end time, such as with a sporting event.
- This is a Featured Event: Choosing this option will prominently feature the event at the top of your calendar. Featured events must occur within the next 30 calendar days to be displayed, and must have an event image. By default, the next four featured events will be displayed on the calendar page.
- Specify Publish Date/Times: Determine when the calendar event should appear on the calendar and when it should be removed from the calendar.
- If the time zone for this event varies from the default time zone, select it from the drop-down.
- Choose whether this is a Public Event, Private Event, or Unlisted Event.
- If applicable, enter the Setup and Breakdown time needed for your event. This prevents others from booking over the setup and breakdown time, while the event on the public calendar will only display the actual event start time.

- Select the desired location from the drop-down menu
Or
- Click Location Search in the Locations You've Selected panel.
- Search or filter the list and check the box next to each location needed for this event.
- Click Save.
- Click on the desired Location Setup for this event. The Capacity and Additional Fee (if any) for setup is displayed beneath each option.
*Note: If this Location Setup has a Task Type associated with it, a task will be created automatically for this location setup when the event is saved. Location Setups and Features are only available if you are using Event Manager Professional or Event Manager Enterprise. Contact Client Services for more information.
- Enter any Location Setup Notes needed for each selected Location.
*Note: If no room configurations are available for the selected Location, you will need to click the name of the location to expand this panel before entering any notes.
- Enter the number of attendees.
- Check the box next to any desired Location Features, such as Stage Lighting or a Podium. *Note: If a feature is grayed out, it is fixed to the location and cannot be removed.
- Click Add Note under a Feature to add details or instructions for the selected Feature.
- To add a location that isn't listed, click Add a Custom Location and enter the name of the location needed.
Categories and keywords allow you to classify your event to make them easier to find when visitors search your site.
- Choose any Category that applies to this event. Visitors will be able to search and filter events based on categories.
- Enter any Keywords or tags that visitors may use to search for your event.

The Additional Information section is where you can let the approver and departments what services will be needed if any.
- Event Setup Details - This section is mostly for insurance purposes
- Anticipated audio/visual use - Selections will notify the IT department of the selections.
- Will food and beverage be offered? This is used so if there is an event where there is food to notify facilities that they will need to check the room after the event to clear trash bins.
- Will alcohol be served? There is a process that needs to be approved if this is selected.

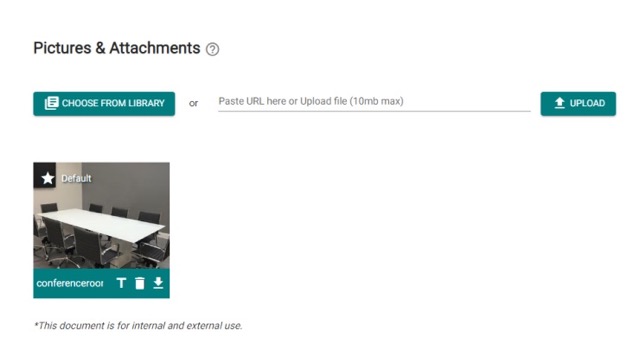
Selecting an image helps the event get noticed as a user scrolls through a long list of events. This also is a good way to get selected as a featured event.
You can upload up to 5 pictures to an event, each with a maximum size of 3MB, and you can add up to 10MB of attachments.
- Upload an attachment by locating the file on your computer, or pasting the attachment URL in the text field.
- Click Choose From Library to find an attachment that has been added to the Event Publisher media library.
- If you have multiple images for an event, click on the star icon in the top left corner of an attachment to select it as the Default for the event. This is the image that will be used in the event listing.
- Click the T icon (
 ) to edit the alternate text that will display when a user hovers their mouse over the attachment. It is also used by visually impaired web browser assistance applications for WCAG conformance.
 - Click the trash can icon (
 ) to remove an attachment from the event.
 - Click the download icon (
 ) to open a picture in a new tab of your browser. If you click the icon on an attachment, it will be downloaded to your computer, where it can be viewed using the appropriate application.
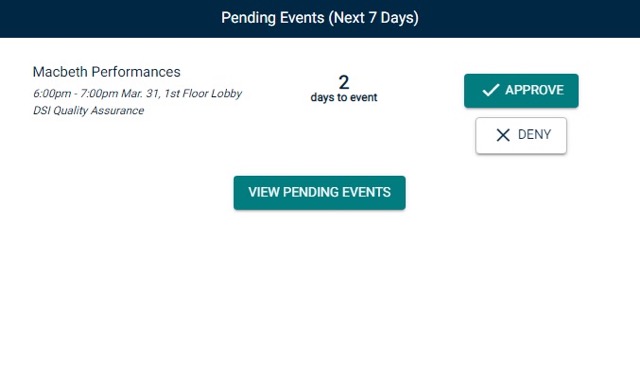
- From the home dashboard, scroll down to the Pending Events panel.
- If necessary, select a site from the drop-down menu to filter the events you would like to approve.
- Click on the event name to open an event and review its details.
- To approve this event and publish it on the calendar, click the Approve button. Once published it will be visible to all calendar site visitors on the grid view, list view, summary view, and location view.
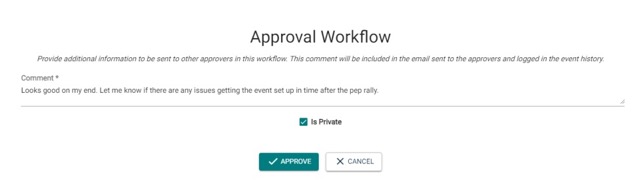
- Enter a Comment if you need to provide additional information that will be sent to other approvers in this workflow. The comment will be included in the email sent to the other approvers and will be logged in the event history.
*Note: This field may be required, depending on the configuration of your approval processes in Event Manager. Additionally, comments will not be emailed to other approvers if the workflow is set up to have all approvers approved, but in no particular order.
- The Is Private box will be checked by default but can be unchecked if necessary.
*Note: When this box is checked, only users with the Event Admin permission will be able to view the comment in the event history.
- The Is Private box will be checked by default but can be unchecked if necessary.
- Click Approve.
- Enter a Comment if you need to provide additional information that will be sent to other approvers in this workflow. The comment will be included in the email sent to the other approvers and will be logged in the event history.
- To reject this request and not publish it to the calendar, click the Deny button. When you click Deny, a pop-up is displayed, offering you the opportunity to enter a reason for denial. This message will be included in an email to the event requester informing them that their event has been denied. They have the opportunity to edit the event and resubmit it for approval.
- If there are conflicts, a Resolve Conflict button will display instead of the usual Approve or Deny options. Click Resolve Conflict to open the event and make any necessary adjustments before continuing to approve the event.
-
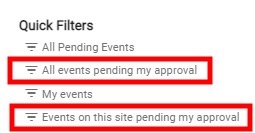
Click on Events from the navigation menu, then select Pending Events.
Events Waiting for Your Approval
-
Click All events pending my approval or Events on this site pending my approval under Quick Filters.
-
All events requiring your approval will display in this list by default. If necessary, the list can be filtered by any of the available options, such as Location, Category, or Organization.
-
Click on the Actions drop-down menu and select Approve.
-
Enter a Comment if you need to provide additional information that will be sent to other approvers in this workflow. The comment will be included in the email sent to the other approvers and will be logged in the event history. *Note: This field may be required, depending on the configuration of your approval processes in Event Manager. Additionally, comments will not be emailed to other approvers if the workflow is set up to have all approvers approved, but in no particular order.
-
The Is Private box will be checked by default but can be unchecked if necessary. *Note: When this box is checked, only users with the Event Admin permission will be able to view the comment in the event history.
-
Click Approve. A record of each approval will be added to the event history.
To approve this event:
-
-
-
To review an event:
- If this is an individual event, click on the event's name and select Review Event in the panel that displays, or from the Actions drop-down menu.
- If this is an event series, click on the event's name and select Review Series in the panel that displays.
- Examine all appropriate sections of the event or event series.
- Click Actions from the side menu and select:
- Approve - To sign off on this event.
- Deny - To deny this event and provide a note to the requester to inform them why the event was denied.
- Edit - To make changes to this event.